
Start with the right Toyota EVAP system
This Camry runs normally but has P0446 and has failed an emissions test. GoTech’s repair lookup points toward the canister. Instead of ordering it from the code alone, the presenter removes and tests the assembly.
The important fork is the system design: the video’s early system has a three-way VSV, or vacuum switching valve. The later design discussed in the video uses a bypass VSV. Confirm the design from service information for your year, engine and emissions application.
▶ Vehicle, code and complaint 0:21▶ Early versus later EVAP design 2:05First checks: connections, hoses and contamination
- Inspect before removing the assembly.
GoTech checks the canister hoses and electrical connections. A valve test will not account for a disconnected hose, damaged connection or a wiring fault elsewhere.
- Plan the access.
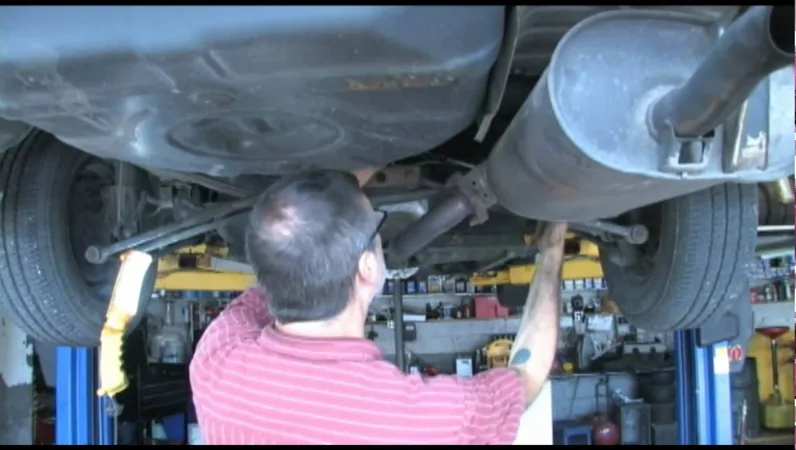
On this Camry the canister is above the rear suspension, ahead of the fuel tank. The demonstration uses a hoist and lowers part of the exhaust for clearance. This is not a reach-under-the-car check; use safe support, a cool exhaust and the vehicle’s removal procedure.
- Check for charcoal in the hoses.
The video includes a canister and hose inspection for loose charcoal. If contamination is found, account for the affected plumbing as part of the repair. Follow the appropriate cleaning or replacement procedure rather than sending debris farther into the system.
What the VSV tests are trying to establish
At home: identify the code, emissions-test result and vehicle application first. This case’s removal and powered bench test need the right access, equipment and service procedure.
In the shop: match the early three-way design, identify each hose, then verify response and switching. The removed-assembly demonstration uses jumper leads and two hand vacuum pumps.
The old valve does not click in GoTech’s powered test. The presenter identifies a failed VSV. Before applying that conclusion to your car, verify the supply, connections and activation method; silence from an unverified setup is not enough.
| Stage in the video | Behavior the presenter describes | Question it answers |
|---|---|---|
| Initially de-energized | The pressure-sensor-side pump does not build vacuum. | Does the initial state behave as the specified test expects? A leak in the test setup can also affect this observation. |
| Energized | Vacuum builds on both gauges. | Does changing the valve state change the vacuum connection? |
| De-energized after charging | Vacuum remains on the purge-side gauge during the hold check. | Does that part of the test hold, rather than immediately lose vacuum? |
| Energized again | The retained vacuum releases. | Does the valve switch back, instead of remaining stuck in the previous state? |
The table follows the presenter’s narrated sequence. It is not a hose-connection diagram or a numeric pass/fail procedure. Obtain the correct port map, electrical limits, vacuum level and hold-time criteria before testing.
Your test does not match? Choose the next check
- No click
- Verify the specified supply and connections before treating silence as a failed valve. The filmed old valve did not click.
- It clicks, but the vacuum behavior is wrong
- Check the port identification and test setup against service information, then work through the specified switching and leakage tests. A click is not the whole pass.
- It passes on the bench, but P0446 returns
- Do not buy a canister just because this one failed in the video. Resume the vehicle’s P0446 procedure, including the installed hoses, wiring and related system checks.
- The system is a later design
- Stop using this early-system sequence. Find the procedure for that valve and emissions application.
Work on fuel-vapor components requires the correct service setup and ignition-source precautions. Do not improvise an electrical or pressure test on an unidentified valve.
Why the whole canister was replaced in this case
The presenter identifies the VSV as defective and says this assembly’s design requires replacing the canister. That is the repair decision for this early system. It is not a rule that every Toyota P0446—or every failed EVAP valve—needs a complete canister.
Before ordering, match the assembly and emissions application, confirm what is serviceable separately and account for any contaminated or damaged hoses. Reconnect the labeled ports correctly and complete the prescribed installation checks.
▶ The assembly-level repair decision 2:57The repair is more than clearing P0446
At the end, GoTech reports that the canister was replaced, the codes were cleared and the Camry passed its emissions test. The monitor completion and test printout are not shown.
- Check the disturbed connections.
Confirm the hoses, electrical connection and assembly are correctly installed. Recheck the fault using the specified EVAP procedure.
- Separate a clear memory from a completed monitor.
Clearing a code does not demonstrate the EVAP monitor has run successfully. Confirm the relevant readiness and fault status under the conditions required by the vehicle before assuming it is ready for an emissions test.
P0446, P0441 and the limits of this case
Does this also diagnose Toyota P0441?
P0441 appears in the video title, but this Camry’s demonstrated complaint is P0446. Use the P0441 diagnostic procedure for your actual system; this case does not establish its cause.
Will this test work on my later Camry or another Toyota?
Not without confirming the system. The video explicitly distinguishes an early three-way VSV from a later bypass design. The vehicle shown is a 1999 Camry with the 2.2L engine.
Does a valve that clicks pass?
A click only shows a response under that electrical test. The video also checks how the vacuum path switches, holds and releases. The correct procedure determines the full pass criteria.
Need the EVAP basics first?
Watch the original GoTech videos
Every timestamp above plays here. Use “Back to where you were” to return to the check you were reading.
Video loads only when you choose to play.
What this guide covers
Diagnostic companion for the early-system 1999 Camry 2.2L P0446 case. No all-Toyota fitment chart, generic port map, universal vacuum specification or demonstrated P0441 repair is claimed.
Written by GoTech from the original videos. The linked source moments let you check the explanation against the demonstration.