
Have a warning or P0521/P0522/P0523? Start with diagnosis before replacing the sensor →
Where is the oil pressure sensor?
On the demonstrated Tahoe, the sensor sits behind the intake manifold, toward the firewall. Mike reaches it from the driver’s side. Use the marked image to identify the sensor and connector; access can differ on other vehicles.
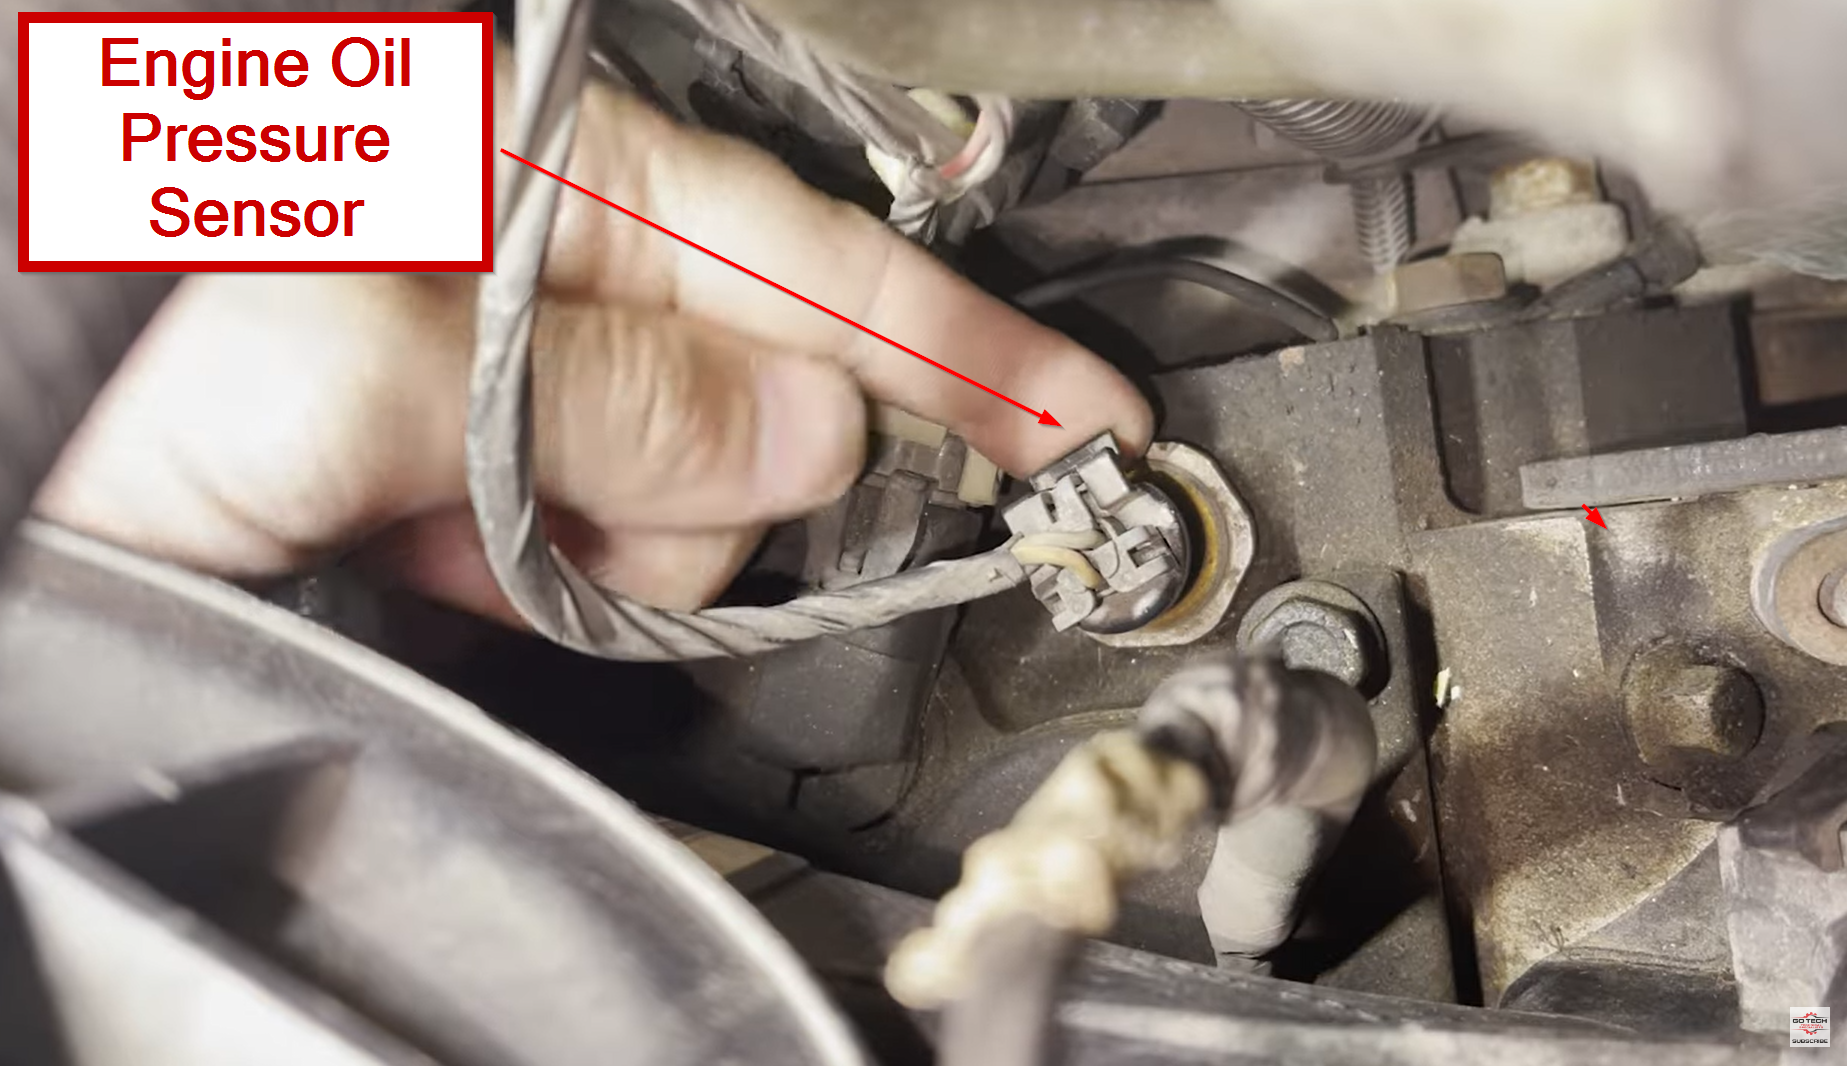 Enlarge sensor location
Watch the original replacement
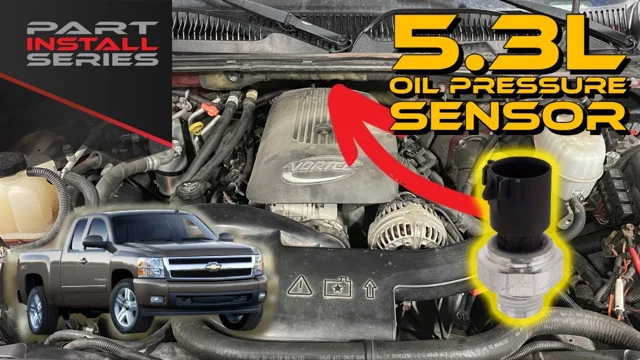
Video loads only when you choose to play.
Which vehicles use oil pressure sensor 12677836?
GM/ACDelco 12677836 is catalog-listed for the 2005 Tahoe shown here and the vehicles below. The video does not identify the installed sensor’s part number.
Check your engine and VIN before ordering. These model/year lists do not cover every engine or trim. Shared part fitment does not establish the same access, torque or filter-screen arrangement.
Chevrolet — Tahoe, Silverado & more
| Vehicle | Model years |
|---|---|
| Avalanche | 2007–2008 |
| Avalanche 1500 | 2003–2006 |
| Corvette | 1997–2008 |
| Express 1500 | 2003–2008 |
| Express 2500 | 2003–2008 |
| Express 3500 | 2003–2008 |
| Impala | 2006–2008 |
| Monte Carlo | 2006–2007 |
| SSR | 2003–2006 |
| Silverado 1500 | 2003–2008 |
| Silverado 1500 Classic | 2007 |
| Silverado 1500 HD | 2003–2006 |
| Silverado 1500 HD Classic | 2007 |
| Silverado 2500 | 2003–2004 |
| Silverado 2500 HD | 2003–2008 |
| Silverado 2500 HD Classic | 2007 |
| Silverado 3500 | 2003–2006 |
| Silverado 3500 Classic | 2007 |
| Silverado 3500 HD | 2007–2008 |
| Suburban 1500 | 2003–2008 |
| Suburban 2500 | 2003–2008 |
| Tahoe | 2003–2008 |
| Trailblazer | 2006–2008 |
| Trailblazer EXT | 2003–2006 |
GMC — Sierra, Yukon & more
| Vehicle | Model years |
|---|---|
| Envoy | 2005–2008 |
| Envoy XL | 2003–2006 |
| Envoy XUV | 2004–2005 |
| Savana 1500 | 2003–2008 |
| Savana 2500 | 2003–2008 |
| Savana 3500 | 2003–2008 |
| Sierra 1500 | 2003–2008 |
| Sierra 1500 Classic | 2007 |
| Sierra 1500 HD | 2003–2006 |
| Sierra 1500 HD Classic | 2007 |
| Sierra 2500 | 2003–2004 |
| Sierra 2500 HD | 2003–2008 |
| Sierra 2500 HD Classic | 2007 |
| Sierra 3500 | 2003–2006 |
| Sierra 3500 Classic | 2007 |
| Sierra 3500 HD | 2007–2008 |
| Yukon | 2003–2008 |
| Yukon XL 1500 | 2003–2008 |
| Yukon XL 2500 | 2003–2008 |
Cadillac — Escalade & CTS-V
| Vehicle | Model years |
|---|---|
| CTS (V trim) | 2004–2007 |
| Escalade | 2003–2008 |
| Escalade ESV | 2003–2008 |
| Escalade EXT | 2003–2008 |
Buick — Rainier, LaCrosse & Allure
| Vehicle | Model years |
|---|---|
| Allure | 2008 |
| LaCrosse | 2008 |
| Rainier | 2004–2007 |
Source: GM parts catalogs, checked October 14, 2026. Use the vehicle-fit check on the catalog page to confirm your application.
Tools & access behind the engine
Mike specifies a 1-1/16-inch oil-pressure-sensor socket with rounded internal corners to fit the demonstrated sensor, plus a ratchet and extension. The cover bolt takes an 8 mm socket. Match the sensor socket and access length to your application.
As an Amazon Associate, GoTech earns from qualifying purchases. Paid links below include an updated ratchet alternative; the other tool links are from the original guide.
3/8" flex-head ratchet — GEARWRENCH 81215XP
Updated alternative, not identified as the tool used in the video. Its 13½-inch length requires room to swing; confirm clearance.- Provides an angled connection where access is restricted. The video does not specify an extension length.
- The demonstrated sensor uses a 1-1/16-inch sensor socket with rounded internal corners.
- Mike uses 22 ft-lb for this demonstration. Confirm the specification for your exact engine and replacement sensor.
Expose the sensor & unplug the connector
Start with a cool engine, as Mike recommends—you will be leaning over it to reach behind the intake.
Open the hood and loosen the engine cover bolt using an 8 mm socket - ↗ 1:09
Remove the engine cover by lifting up and releasing the rear tabs - ↗ 1:14
Locate the engine oil pressure sensor on the back or firewall side of the engine and unplug the sensor connector - ↗ 1:22
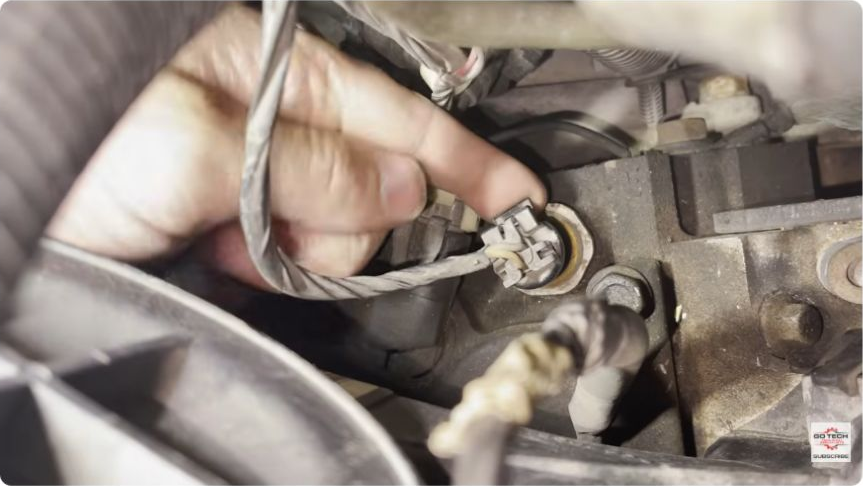
Remove the sensor & check for a screen
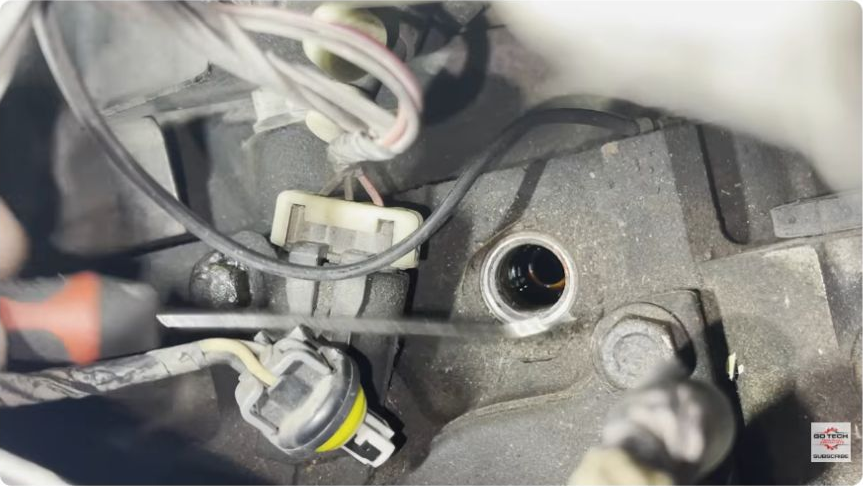
Using the special socket and an extension with a wobble or universal adapter remove the old sensor - ↗ 1:35
Where fitted, inspect the screen in the oil-pressure port for restrictions. Follow the applicable service procedure to clean or replace it. Watch the screen inspection · 1:43
Inspecting the screen is different from proving the sensor is faulty. Read the diagnostic context →
Install, reconnect & verify
Check the replacement sensor’s specified washer and thread-sealing arrangement. The source checks these before installation; follow the replacement-part instructions rather than automatically adding more sealer. Watch the new-sensor check · 2:30
Align the sensor and start the threads by hand, as shown. Watch installation · 2:36
Source value: 22 ft-lb. Mike uses this on the demonstrated 2005 Tahoe 5.3L—not a universal specification for all GM V8s. Confirm your engine and sensor specification; overtightening can break the sensor. Watch the source torque step · 2:40
Reconnect the sensor. Once it is appropriate to run the engine under the applicable service procedure, check the installation for oil leaks before refitting the cover. Watch the leak check · 3:10
Source & application
GoTech’s original article and video, July 14, 2022. Updated October 14, 2026 with source-video close-ups, GM catalog application lists and a corrected ratchet option.
Vehicle coverage & source notes
At 0:14, Mike identifies the demonstration as a 2005 Chevrolet Tahoe with a 5.3L V8. At 2:15–2:27 he confirms no screen is fitted and says the gauge was stuck high. The video title also names 4.8L and 6.0L engines; it does not establish a verified procedure or parts application for every vehicle in those families.
The English caption track and the connector/port frames were reviewed on October 14, 2026. Tool sizes and torque are attributed to this demonstration. Extension length, other vehicles’ screen fitment and technician verification of the revised guidance remain open.
The original guide estimated 45–60 minutes and difficulty 2/5. Those are source estimates, not a completion promise; access and experience vary.
Article provenance
Source mdx-12b240f9f2fbce7e72ea
SHA-256 966fb6e48077d233121c6b32ba40b48fe9113cbd1c66c353abacedefcb631629