
Before buying a compressor, check the rest of the system
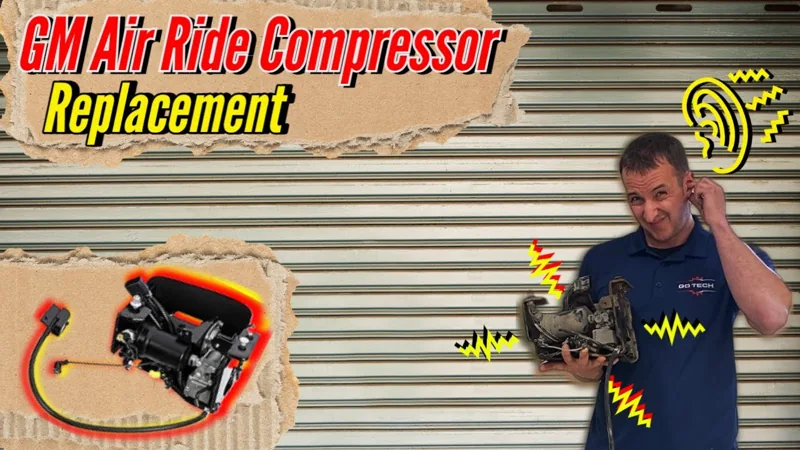
The old compressor is loud, and the housing is cracked. GoTech suspects moisture got in, but the video does not test that explanation. Check the rest of the system before treating the pump as the whole problem.
▶ Listen to the complaint and inspect the housing 0:00Build a short check list
- Save suspension codes and the complaint. Note whether it fails to level, runs too often, or is simply noisy.
- Check the supply side. Follow the vehicle procedure for fuses, relay and electrical connections.
- Look for another reason it is working so hard. Inspect air lines, fittings, rear air shocks and their connections. A replacement compressor does not fix a leak elsewhere.
- Identify the actual suspension. Match the VIN, suspension option, original assembly and electrical/air connections before choosing a part.
Diagnostic context: Arnott’s compressor checklist; leak-related compressor overload: Arnott’s air-spring bulletin. These references do not identify the part used in this video.
A replacement option: Arnott P-3242
AFTERMARKET OPTION · CHECK YOUR APPLICATION
Match it to the vehicle before ordering.
Arnott lists the P-3242 air-suspension compressor for several GM applications, including Yukon and Yukon XL families. We have not confirmed the part number used in this video. This is an option to check, not a claim that it fits every GMC or uses the same installation steps.
- Identify the vehicle and suspension.
Have the year, model, VIN and suspension option/RPO ready. Check what is actually installed too, especially if the suspension has been changed.
- Confirm the exact application.
Use Arnott’s current listing and ask Arnott or your parts supplier to confirm any unclear year or suspension-option match. “GM air ride” alone is not enough to order by.
- Compare the assembly and connections.
Check the original part number where readable, mounting bracket, electrical connector, air-line fittings and breather routing against the replacement instructions. A similar-looking pump is not proof of fit.
- Plan the refill before taking it apart.
Read the matched part’s instructions alongside the vehicle service procedure. Have the required pressure-release, refill and initialization method ready, plus the specified mounting torque and final checks.
The links above go to Arnott’s own application and installation information. Still deciding whether the compressor is the problem? Start with the system checks.
Tools and setup before disconnecting an air line
Tools shown in this job
- 13 mm socket with extensions. Access through the frame calls for a shorter extension at one mounting nut.
- Trim tool. Used to release the breather-hose attachment near the filler neck.
Match the hardware on your vehicle. These are the demonstrated tools, not a complete vehicle-specific equipment list.
▶ See the socket and extension access 2:31GoTech says this particular failed system had no pressure left. That is a condition of the filmed case, not a safe way to judge yours. The video does not demonstrate a pressure-release sequence you can follow on a system that still has pressure.
The Arnott P-3242 instructions call for pressure relief, power isolation and proper support, and specify installation by qualified personnel. Use those instructions only after confirming the part application; the video does not supply a substitute pressure-release procedure.
Have these in hand before the job
- The correct lifting/support points and suspension isolation procedure.
- The specified depressurization and refill method, including the required scan-tool functions.
- The matched compressor’s instructions, hardware requirements and mounting torque.
- The leak-test and ride-height checks that will confirm the repair.
DIY decision
If you cannot verify the pressure-release method or safely support the vehicle, stop before disconnecting anything. This guide can still help you explain the complaint and understand a shop’s repair plan.
Four things to track before the assembly comes down
The frame-mounted assembly looks busy until you separate the jobs of the connections. This is the layout described in the video—not a universal GM suspension diagram.
Replace the compressor: follow the connections
Once pressure is relieved and the vehicle is safely supported, the job comes down to the breather, slotted mount, electrical connector and air lines. Keep track of what is still attached as the bracket comes free.
- Release the breather attachment.
GoTech unclips the hose/filter attachment near the filler neck. Keep track of its routing so it can go back into place.
▶ Breather and filter attachment 1:30 - Understand the slotted mount before removing hardware.
On this assembly, the three nuts are loosened rather than removed completely. GoTech uses a 13 mm socket and changes extension length for access through the frame. Those are demonstrated tool details, not a universal hardware specification.
▶ Mounting nuts and access 2:10 - Support the assembly while freeing the remaining connections.
The bracket slides out of its frame slots. The connector and passenger-side air line are then released before the unit comes down. Do not let the assembly hang from either.
▶ What is still connected 3:44 - Seat the new connections and locks.
GoTech reinstalls the retaining clip, keeps contamination out of the connection, and seats the line. The electrical locking tab goes back in too. Use the instructions for the actual fitting and replacement part.
▶ Retaining clip, line and connector 5:00 - Refit the bracket, breather and rear-shock connection.
Check that the mount is seated, route the hose back to its attachment, and reconnect the rear shock. The video provides no mounting-torque value; get it from the correct service information.
▶ Seat the bracket 6:00▶ Return the breather and rear-shock line 7:25
The pump is installed. Now prove the system works.
Key-on does not start the new compressor in the filmed case. Starting the engine and lowering the vehicle a little farther do not start it either. That sequence is a reminder to know the prescribed fill procedure before you begin.
▶ Watch the refill problem develop 8:15Arnott’s diagnostic checklist calls for the correct installation and inflation procedure and notes that initialization requirements vary. A running compressor alone is not a completed repair.
- Use the correct refill and initialization procedure.
Follow its support, loading and scan-tool requirements. Confirm all disturbed connections and any height-sensor links are in their specified configuration.
- Check for leaks using the specified method.
Include disturbed fittings and the air shocks/lines, not just the new compressor.
- Check the result against the complaint.
Confirm the specified ride height and operation, recheck suspension codes, and verify that the original noise or leveling fault is resolved. Use a safe final driving check only after the vehicle is ready for service.
What the video leaves open: it does not document a measured leak test, final height tolerance or a completed road test. Those checks still belong in the repair plan.
Common air-ride compressor questions
Does this guide fit my Yukon, Tahoe, Suburban or Escalade?
The filmed case is a GMC with rear air shocks; its exact application remains unconfirmed. Arnott lists P-3242 for several GM families, but that does not make this procedure universal. Use the part and fitment checks to confirm your vehicle and suspension before ordering.
Can I replace the compressor without a scan tool?
Do not plan the job around the workaround shown in this video. Confirm the vehicle’s required pressure-release, refill and initialization functions first. If the specified procedure needs a suitable scan tool, arrange one or have the system serviced by a shop.
Does a cracked compressor prove moisture caused the failure?
No. GoTech suggests moisture as a possible cause in this case, but the video does not establish it. Inspect the rest of the system rather than treating the suggested cause as a confirmed diagnosis.
What torque and pressure should I use?
The video does not provide verified specifications for those values. Use the exact vehicle’s service information and the installed compressor’s instructions; this guide supplies no substitute numbers.
Taking it to a shop?
Bring the symptom, any suspension codes and the exact vehicle details. Ask what failed, what else was checked for leaks, and how the shop will verify pressure retention and correct height after the repair.
Watch the original compressor case
Every timestamp above plays here. Use “Back to where you were” to return to the check you were reading.
Video loads only when you choose to play.
What this guide covers
This guide follows the GMC rear air-shock repair shown in the video. Its exact model, year, suspension option and compressor part number remain unconfirmed. The Arnott P-3242 section is a separate catalog option, not identification of the filmed part or proof of fitment. The video shows the replacement and a workaround to run the pump, but no measured leak test, specified final ride-height result or completed road test. Use the matched part’s instructions and the exact vehicle’s service information to finish the repair.
Written by GoTech from the original videos. The linked source moments let you check the explanation against the demonstration.