How to Test EVAP Purge Solenoid
EVAP Purge Solenoid Operation
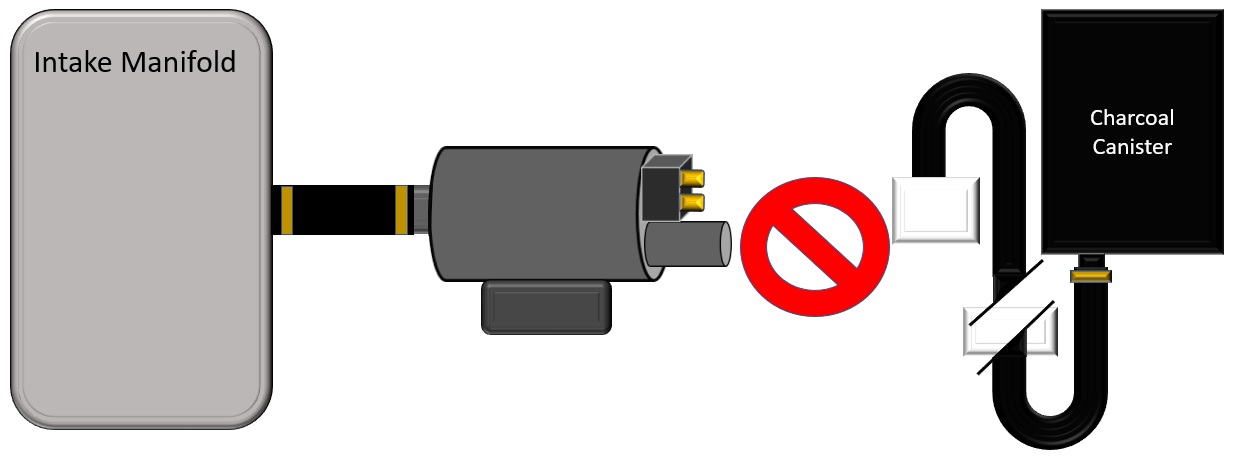
- A purge solenoid is a normally- closed solenoid that controls the flow of engine vacuum to the EVAP system
- The engine control module controls the purge solenoid by a varying duty cycle
- Most purge solenoids are ground side controlled. The major exception is Chrysler's purge sense, which uses high side control and monitors ground for current flow (Used on SBEC IIIA, NGC, & GPEC control modules)
- Purge solenoids are also referred to as vapor management valve or vacuum switching valve
Common Purge solenoid related trouble codes
- P0440: Evaporative emissions control system malfunction
- P0441: Evaporative emissions control system incorrect purge flow
- P0496: EVAP Flow During a Non-Purge Condition
- P1441: EVAP system flow during non-purge
- P144a: Evaporative Emission System Purge Vapor Line Restricted/Blocked
EVAP Purge Solenoid Testing
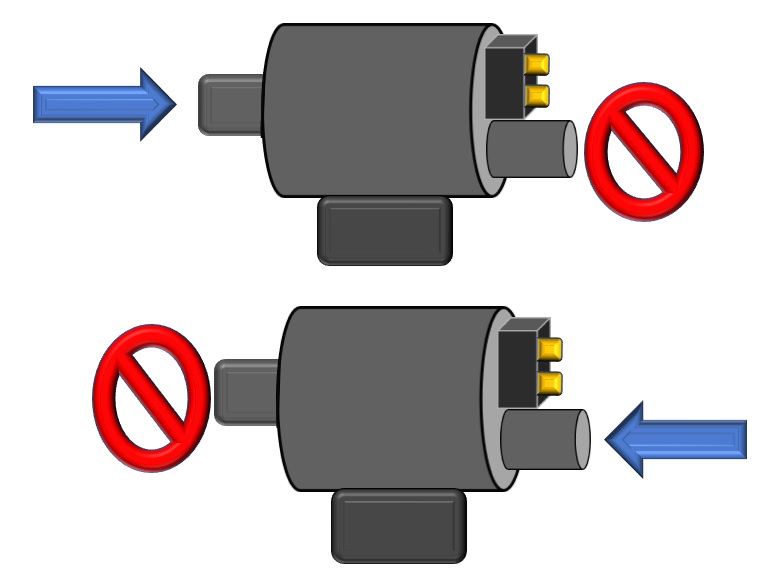
Mechanical Sealing
- Unplug the purge solenoid electrical connector and connect a vacuum gauge to the canister side port of the purge solenoid and start engine, no vacuum should be present, or the purge solenoid is leaking. (If no vacuum gauge is available place your finger or piece of paper in front of port to verify no vacuum is present)
- Remove solenoid and use a hand vacuum pump to verify that the solenoid holds vacuum and pressure at each port
Electrical Solenoid Operation
- Use a full functional scan tool with the solenoid plugged in to activate solenoid
- If a scan tool is not available, unplug the solenoid and use jumper wires (preferably fused) to apply 12 volts from the battery positive terminal and ground from the battery negative terminal to activate the solenoid
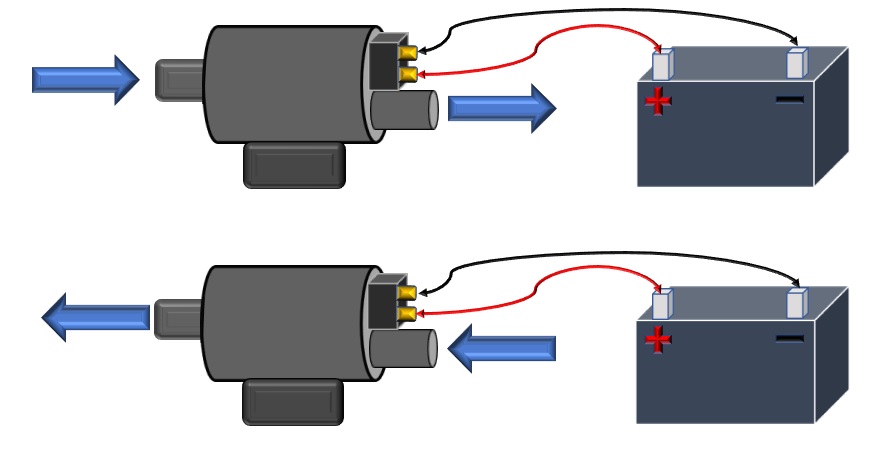
- Listen for the solenoid to click and make sure there is flow between ports when solenoid is activated
GoTech Tips
Tip : Some solenoids are designed to release under certain amounts of pressure/vacuum, in these cases compare pressure to normal operating conditions to assess if a failure is present