
How to smoke test the EVAP system
Start with the connection and vent control. GoTech shows the setup on a known-good 2011 Chevrolet Traverse 3.6L. Use your vehicle’s procedure for the connection, valve commands and pressure limit.
Use an EVAP-rated smoke machine with its approved fluid and gas supply. Keep the engine off while the machine is connected, work in a ventilated area and keep ignition sources away.
Confirm the fault and smoke output
Record the codes and conditions when the fault occurs. Run the vehicle’s EVAP self-test if available; an intermittent leak may not be present now. Check that the machine actually produces smoke before connecting it.
Connect to the area you need to test
In the video, the presenter checks purge-valve sealing separately, then connects the smoke hose to the tank-side line at the purge valve. That covers the vapor system behind the connection; the purge valve itself remains outside the test. Use a correctly fitting adapter that protects the connector and O-rings.
What about a service port or filler-neck adapter?
The video also discusses an EVAP service port and a filler-neck adapter. Follow the vehicle procedure and the adapter instructions. A filler-neck connection replaces the fuel cap during testing, so that test alone cannot clear the cap. With a service-port connection, account for the purge path so smoke does not escape into the intake.
Fill the system, then close the vent
Verify smoke reaches the far end of the test area. In the demonstration, the presenter checks at the filler opening and reseals it; he also describes checking at the vent before closing it. Command the vent closed using the supported scan-tool function and confirm the filler and adapter are sealed. Smoke from an intentionally open vent is expected during filling.
Can I do this without a bidirectional scan tool?
You still need the vehicle’s supported way to seal the vent. A basic code reader may not provide output controls. Use an approved alternative from that vehicle’s test procedure; do not copy a jumper-wire method without confirming the circuit and control type. Review vent operation and testing.
Read the flow and look for escaping smoke
After filling, interpret the flow indicator using the machine’s instructions. Inspect hoses, connections, the tank, canister and filler area. A pressure rise alone does not prove smoke reached every section. Use the result below to choose the next check.
Smoke output · 3:15 · Connection · 4:15 · Vent control · 7:00 · Smoke coverage · 10:30
Smoke test results: what to check next
- Smoke escapes from a hose, seal or component: first rule out the test adapter or an intentionally open vent. Locate the actual failure before buying parts; a leak code alone does not identify the part.
- Flow continues, but no smoke is visible: recheck smoke output, the adapter, vent closure and whether smoke reached the area. Follow the detector’s leak-location instructions; increasing pressure beyond the permitted limit is not the next step.
- No leak appears: verify coverage before calling it a pass. Check the excluded purge valve for sealing and flow. A fault that occurs only under other conditions may need a repeat test when it is active.
- Fuel-tank pressure data does not respond as expected: compare the reading with what the test is doing. Follow the pressure-sensor checks before using that reading to judge a leak.
After repairing the leak
Restore every hose, connector and cap, and return commanded valves to their normal state. Repeat the test that exposed the fault. A successful leak recheck and a completed EVAP monitor are separate results; record both when available.
Looking for a different kind of smoke test?
Car smoke test, intake vacuum-leak test or smog test?
“Car smoke test” or “automotive smoke test” can describe leak testing in different systems. This guide covers EVAP fuel-vapor leaks. An intake or vacuum-leak smoke test checks the engine’s air path and requires its own connections and equipment settings. Do not transfer an intake or boost-test pressure setting to the fuel-vapor system.
A smog test is an emissions inspection. For example, California’s Smog Check can include visual, functional, OBD and tailpipe checks depending on the vehicle. Finding and repairing an EVAP leak may address one fault; a smoke test alone does not establish that a vehicle will pass. See California BAR’s inspection guide.
Case details and supporting explanation
Know which system you are sealing
This demonstration identifies a 2011 Chevrolet Traverse with the 3.6L engine and a purge/seal system. The presenter distinguishes EVAP test equipment from machines intended for other pressure ranges and explains why the normally vented path must be accounted for during a leak test. Use the equipment instructions and current vehicle procedure for actual settings.
The connection point changes what the test covers
The presenter connects on the tank side of the purge valve after considering the valve separately. That setup covers the system behind the connection; it does not establish the purge valve’s sealing performance by itself. This is why the purge resource is a separate branch of this web.
An intermittent fault may not appear in this test
The video cautions that a fault which is not active during testing can be difficult to reproduce. A smoke test with no visible leak at that moment does not establish that an intermittent EVAP concern is resolved.
A second case: check what the first test leaves out
In the separate P0455 case, the technician revisits the purge valve after testing the rear portion of the system and reports an additional leak there. The case illustrates a test-coverage gap; it does not make that vehicle’s repair the next step for the Traverse.
Watch the source in context
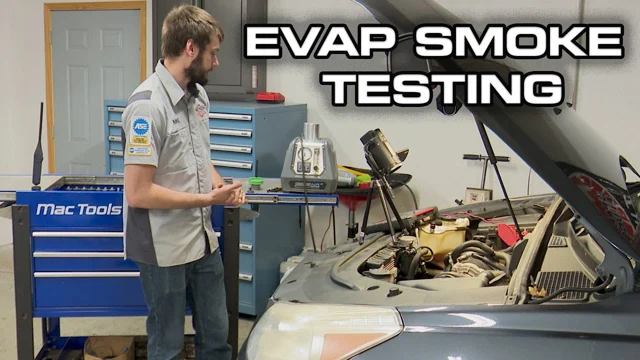
Video loads only when you choose to play.
Did this help you move forward?
Optional. No written response is collected.
Sources and vehicle-specific limits
GoTech editorial guidance with AI assistance, based on the cited demonstrations and public references. The decision sequence is our synthesis. Vehicle procedures supply connector details, test pressures, calibrations and pass/fail limits. These instructions have not been independently tested on every application.
- Know which system you are sealing
- Source-reported Traverse demonstration. No ASR-derived pressure limit, jumper method or universal fitment. Watch the source · 1:00
- The connection point changes what the test covers
- The demonstrated connection and its coverage; not a universal connection instruction. Watch the source · 4:15
- An intermittent fault may not appear in this test
- Qualitative source explanation. No percentage success claim or diagnostic threshold carried forward. Watch the source · 11:43
- A second case: check what the first test leaves out
- Separate case; no shared fitment, numeric leak-size inference or repair transfer. Watch the source · 17:00
GoTech’s EVAP smoke-test video: known-good 2011 Traverse 3.6L. Smoke output at 3:15; connection options at 4:15; vent control at 7:00; coverage at 10:30. The approximate spoken pressure figures are not used as test settings here.
Bosch SMT 300 operator manual: safety, smoke delivery, flow interpretation and separate leak-test applications. This supports the equipment guidance; it does not identify the machine in GoTech’s video.
California Bureau of Automotive Repair: what a Smog Check inspection can include. Inspection rules are separate from this EVAP leak-test workflow.
About older links to this guide
This guide has been rewritten around the available source evidence. An older section link may land here; use “In this guide” above to find the revised explanation. Original source files are retained in GoTech’s review history.