
01 · Understand
What do P0171 and P0174 mean?
The computer is adding fuel to correct a reported lean condition, and it has reached the limit set for this vehicle. We have a fuel-control problem to investigate. The code hasn’t told us which part caused it.
This shows the basic idea in closed loop. The code-setting limits, conditions needed to run the monitor and sensor signals depend on the vehicle.
Symptoms & driving concerns
You might have a rough idle, hesitation, low power, stalling or misfires—or just a check-engine light. Those clues help, but they don’t identify the cause. Follow your vehicle’s warning instructions. This page can’t tell you that a poorly running vehicle is safe to keep driving.
02 · Record
Before you clear anything, save what you found
Start with a scan tool that reads codes, freeze-frame data and live engine data. Only have a code reader? Save what it shows. That gives you something useful to take to a technician.
- All codes and their status. Write down related misfire, air-metering, temperature and fuel-system codes too. What work was done recently? When did the problem start?
- The freeze frame. Save engine temperature, RPM, load and any fuel-trim data. Was the engine cold? Idling? Under load? Those details help us choose the next check.
- Each available bank. Save short-term fuel trim (STFT) and long-term fuel trim (LTFT), along with temperature, load and loop status. Compare the banks under the same conditions.
Short-term trim is the correction happening now; long-term trim is what the computer has learned. Look at both. Positive correction means fuel is being added, but one reading won’t tell you whether every vehicle passes or fails. See freeze-frame reasoning 5:35
One bank or both banks?
This comparison helps narrow down where to look. We still need a test before calling a part bad.
Both banks look similar
Start by looking at what both banks share: air measurement, an intake path or the fuel supply. That gives you a direction to investigate. You still need to test it—two codes don’t prove one shared fault.
Air-measurement checks →Fuel-system checks →Intake / PCV checks →
One bank stands out
Look at what’s different on that bank: its intake, fuel delivery, exhaust and sensor feedback. Keep shared systems in mind too. They can affect one bank more than the other.
Intake / PCV checks →Fuel-delivery checks →Exhaust / feedback checks →
Only one bank is available
Check the engine layout in service information first. If there’s only one bank, compare how it behaves under different conditions. Don’t guess where Bank 1 or Bank 2 is located.
Use your recorded conditions to choose a check →What counts as a normal fuel-trim number?
There isn’t one percentage we can use to pass or fail every vehicle. Check the manufacturer’s limits and required test conditions. Save both trims, their positive or negative signs, and what the engine was doing. Don’t pick just the number closest to zero.
The Sienna rich-code case shows why this matters: short-term and learned correction can point in opposite directions when the operating conditions change.
Now let’s choose a check that helps separate the possible causes.
03 · Test
What should you check next?
What was the engine doing when the code set? Start there, then look over the intake, hoses, connectors and any recent work. Choose the check that fits what you’ve found. These are possible causes to test, not a shopping list.
Air entering where it should notIntake, PCV, hoses or a suspected air leak
Is air getting in that the computer hasn’t accounted for?
- What you need
- Start with a visual inspection. If you need a smoke or leak test, use the method specified for this engine.
- What to look for
- Look for damaged or loose intake and PCV hoses. If you find a leak, compare it with the fuel-trim behavior under the conditions that brought on the problem.
- What it does not prove
- The code won’t tell you where a leak is. Neither will a change in trim when you raise the RPM. When you test the intake, account for the PCV, purge and other systems connected to it.
- Next step
- Find the leaking path before choosing a hose, gasket, valve or other repair. The GM 1.4L case below shows how that worked for one PCV problem.
Air measurement & temperature inputsUnexplained airflow/load data or recent intake work
Do the sensor readings make sense for what the engine is doing?
- What you need
- Live scan data, the vehicle’s wiring and service information, and the equipment its test procedure calls for.
- What to look for
- Check whether airflow and temperature readings make sense as conditions change. Look at the intake installation, connectors and any recently replaced parts too.
- What it does not prove
- One grams-per-second rule won’t prove every MAF good or bad. Dirt or a reading you don’t recognize is a reason to investigate, not enough to order a sensor.
- Next step
- Use the vehicle’s procedure to test the suspect input and its circuit. Correct any installation problem before judging the sensor.
Fuel deliveryA fuel-supply, pressure or injector concern
Can the fuel system keep up when the problem happens?
- What you need
- The pressure, volume or injector tests specified for this fuel system.
- What to look for
- A measured result outside the manufacturer’s specification under the conditions you’re investigating.
- What it does not prove
- Pressure may look fine at idle and still leave a delivery problem under other conditions. The lean code alone won’t tell you whether a pump or injector is bad.
- Next step
- Narrow it down to the failed part of the fuel-supply or delivery system before repairing it. For direct injection, follow the system’s high-pressure safety procedures.
Exhaust & oxygen feedbackAn exhaust, sensor-response or circuit concern
Is the sensor reporting the mixture correctly?
- What you need
- The exhaust-leak, oxygen/air-fuel sensor and circuit tests specified for this vehicle.
- What to look for
- Check for exhaust leaks that could affect the reading, and check whether the feedback signal responds as the procedure describes.
- What it does not prove
- Sensor designs use different signals. A sensor reporting lean may be doing its job. Test it before deciding it’s bad.
- Next step
- Repair the exhaust, sensor or circuit fault you’ve confirmed. Then go back and recheck the original mixture problem.
Use the vehicle’s service procedure for test conditions, limits and safe connections. Missing the right equipment or reliable data? Leave the result inconclusive and get what you need before choosing a part.
04 · Repair
You found a fault. What needs fixing?
Before you order anything, ask: what failed, how did we prove it, and how will this repair fix it? If you only have the code, there’s still testing to do.
- Confirmed fault: What failed the test? Is there another explanation we still need to check?
- Correct repair: Match the engine, component design and replacement instructions. Then ask why the part failed. Is something else going to damage the new one?
- Procedure & equipment: Get the access steps, seals, specifications and tools ready before you take it apart.
- Verification plan: Decide what you’ll check afterward. Use the original problem and readings as your starting point.
From the original GoTech video
Worked case: GM 1.4L PCV leak
In the shop: a 2015 Buick Encore with the 1.4L turbo. It has one bank and a P0171 code. Follow the reasoning here, but use the procedure for your engine. This case doesn’t demonstrate a P0174 repair.
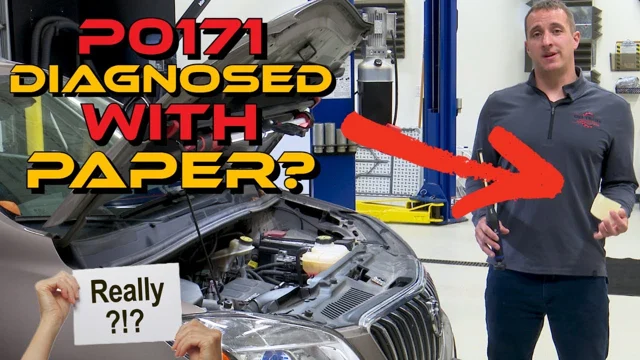
What changed the repair decision?
Leaking diaphragm
Observed: The paper gets pulled against the PCV breather shown in the video.
What it supports: We’ve found a leaking diaphragm in the cam cover. But hold on—what made it fail?
Inspect the diaphragm 1:24Missing non-return valve
Observed: The intake-manifold non-return valve is missing on this engine.
What it supports: The intake fault needs attention along with the cover. Replacing only the cover would leave the cause in place.
Connect the two findings 2:47After the repair
Observed: The breather no longer pulls in the paper, and fuel correction improves in closed loop.
What it supports: The immediate recheck looks better. The video doesn’t show long-term monitor completion.
Compare the recheck 9:11Follow the five-step repair story
- Concern
A 2015 Buick Encore 1.4L turbo has P0171, an idle whistle and oil-consumption concerns. Hear the symptoms 0:27
- Evidence
The paper test points to a leaking diaphragm at the cam cover. Looking into the intake manifold reveals a second finding: the non-return valve is missing. See the PCV check 1:10
- Repair decision
The cover is leaking—but why did it fail? Mike checks the intake valve before choosing the repair. Both faults need attention. See why both faults matter 2:47
- Repair
Mike replaces the cam cover and intake manifold, then reconnects everything. Watch the hose seal and how it seats. A leak there would leave us with a new problem. Follow the repair 4:31
- Recheck
Mike goes back to the fuel trims in closed loop and repeats the paper check. The correction improves, and the breather no longer draws in the paper. Watch the recheck 9:11
Open the illustrated GM 1.4L repair guide → Check that the procedure matches your engine, and use current service information. Whether a part can be serviced separately, torque specs and sealant requirements depend on the application.
You can watch the immediate recheck here. The video doesn’t show long-term monitor completion, and it can’t confirm the repair on another vehicle.
05 · Verify
How do you know the repair helped?
- Check the work. Look over the hoses, connectors, seals and leak paths you worked on before running the specified test.
- Return to the original concern. Go back to the original symptoms and fuel-control readings. Where it’s safe and appropriate, compare them at similar temperature, RPM, load and loop status.
- Account for learned values. Follow the manufacturer’s reset and relearn instructions. Clearing a code or resetting a trim doesn’t tell us the repair worked.
- Check codes and monitor status again. Follow the conditions required to complete the monitor. A light that stays off right after you cleared it isn’t the same as a monitor that has run and passed.
Evidence improved
Write down what changed and under what conditions. Then finish the required checks. Better readings now are useful, but you still need to know whether the monitor completed and passed.
Concern remains
Check your installation first. Then go back to the findings and the next explanation you haven’t tested. Don’t keep adding parts to a repair you haven’t confirmed.
Cannot reproduce it
Write down what you couldn’t reproduce and which condition is missing. Leave the result inconclusive. Don’t call it fixed or repeat unsafe tests just to force an answer.
Sources & coverage
Source published June 8, 2022 · Guide updated October 19, 2026
Use this guide to understand the code, choose a check, follow a real repair and plan the recheck. For the repair on your vehicle, you’ll still need the procedure that matches its engine and the fault you found.
See source notes and what remains unverified
Original GoTech article published June 8, 2022. This guide draws on GoTech’s original article and video, with archived video details and English captions reviewed October 18, 2026. Play the original case here 0:00.
Bank and freeze-frame reasoning: One bank or both 3:17 · Freeze-frame context 5:35. The later training example shows an immediate improvement after intake work; a completed drive-cycle result is not shown.
We used the captions to explain the diagnostic reasoning, not to supply exact test specifications. Get pinouts, pressures, torque specs, test limits and complete removal steps from current service information. An independent technician review of this revised guide is still pending.
Recording freeze-frame evidence before resets is also supported by Ford TSB 04-17-4, for the vehicles it lists. Don’t apply its numbers or procedures to every vehicle covered by these code guides.